10 Pack Microgreens Tray
10 Pack Microgreens Tray
This link to Amazon is managed by
![]()
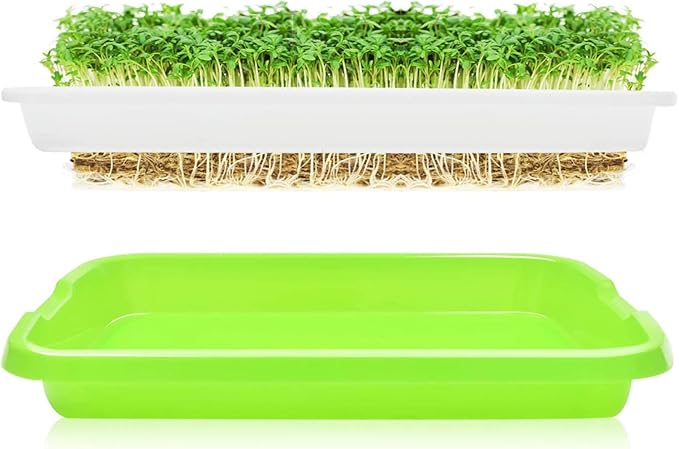
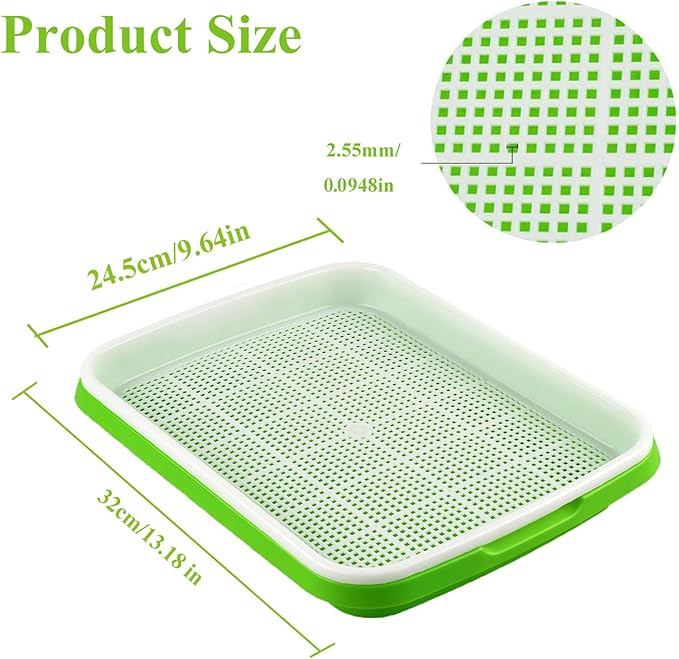
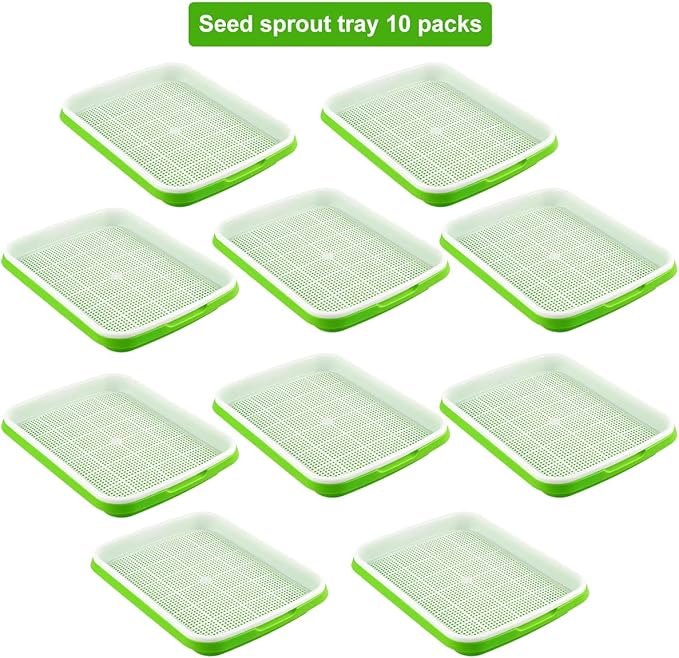
- 【SIZE】Inner Tray Size: 12.4” x 8.66“ x 0.78”Bottom Tray Size: 13.18” x 9.05“ x 1.57”. 10*Green Disk, 10*White Net Disk.
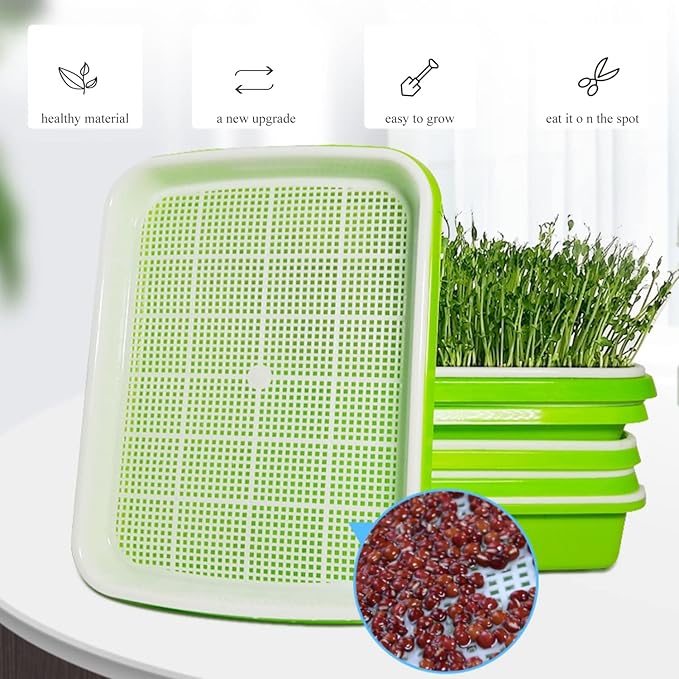
- 【MATERIAL】Made of food grade raw materials, can sprout multiple types of beans without soil or chemical additives, health and safe, eco-friendly.
- 【10 PACK TRAYS WITHOUT COVERS】The package contains 10 pack trays without covers, Heat and moisture preservation, without soil or chemical additives, high budding rate and grow faster.
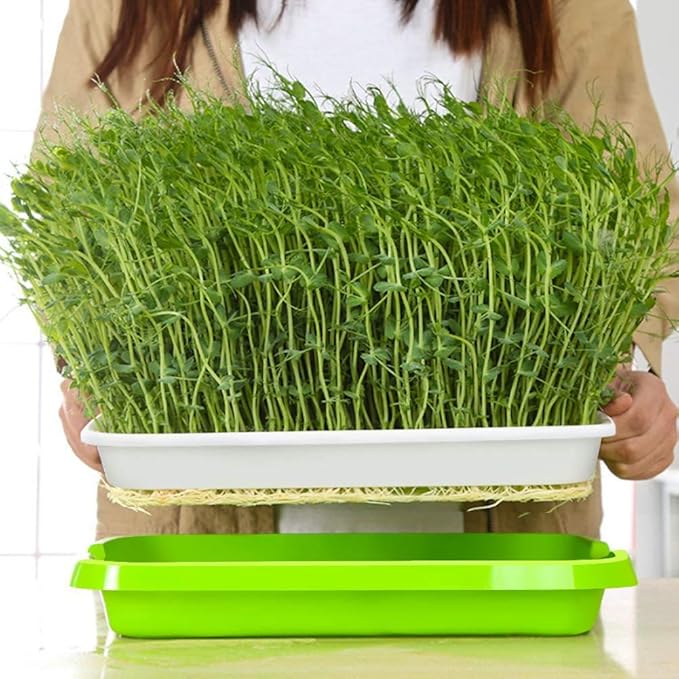
- 【CONVEX DESIGN】Concave-convex design, convenient to take out inner mesh tray, inside mesh tray provides excellent breath ability, facilitate beans germination.
- 【WIDELY USE】The beans germination tray can be used for various types of small beans, such as peas, wheat grass seed, okra, alfalfa, vanilla, peanut, little cabbage and so on.(Seed germination has relatively high requirements for sunlight, air, moisture and temperature. Providing suitable environmental conditions is more conducive to seed germination and growth)
Product Description


Feature:
1.the sprout tray no cover, heat and moisture preservation
2.Densely small hole, take root easily, high budding rate
3.Grid design, ventilate well, against root rotting
4.Main function: sprout multiple types of seeds
5.Additional function: a storage tray for holding fruits and vegetables
6.size hole: small hole and super small hole, No seeds can flow out
7.Application scenarios: home decoration, greening, flower nursery production, home gardening, balcony garden, suitable for seedling cultivation of various types
Specifications:
- Color: Green + White
- Material: Plastic material, non-toxic no chemical additives
- White Inner Tray Size: 31.5*22*2 cm/12.4*8.6*0.7 inches
- Green Chassis Size: 33.5*23*4 cm/13*9*1.5 inches
- Single Product Size: 33.5*23*6 cm/13*9*2.3 inches
- 10 Pieces of Product Total Size: 35*23*12 cm/13.7*9*4.7 inches
![]()

![]()

![]()


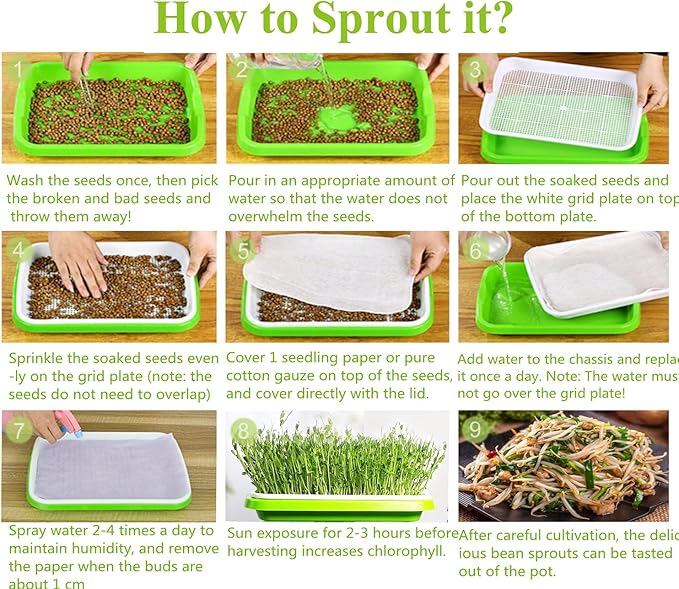
How to sprout?
1. Put the seeds into the green tray, add an appropriate amount of water to submerge the seeds, and pick out the inferior seeds floating on the water surface. Wash the remaining seeds once, then pour in some water to soak the seeds for a few hours.
2. The soaked seeds will not fall out of the holes of the grid tray, and then place the seeds evenly on the grid tray. (Note: Do not let the seeds stack together, otherwise the seeds may become moldy and cannot be normal germination)
3. Place a clear lid over the tray; if the tray does not have a lid, cover the seeds with paper or cotton gauze.
4.Add water to the bottom of the tray and use a watering can to sprinkle just the right amount of water on top of the seeds, sprinkle water for 2~4 time every day to keep wet.
5.When the buds grow to 1 cm height, start to add some water to the bottom tray when the bud of the root pierces the planting plate.
6.The seeds germination time is different. Before harvesting, put them in sunlight for 2~3 hours to increased chlorophyll.